
Stand at the center of a finished LED dome and look up. If the dome is well built you see one continuous surface. If it is not, you see a grid of faint lines converging on the apex like the ribs of an umbrella — and once you have noticed them, you cannot stop noticing them. Nothing else about the screen matters after that.
Seamless LED dome splicing is the single hardest mechanical problem in this product category, and it is the one buyers understand least. A flat LED wall is a grid. A dome is not. The curvature changes in two directions at once, the circumference shrinks to zero at the top, and every module has to land on a surface that no rectangle can tile.
This article explains how the geometry actually works, why module shape matters more than pixel pitch in the first year of operation, what happens at the pole, and what to write into a specification so that "seamless" means something measurable rather than a word in a brochure.
What a seamless LED dome actually requires
On a flat screen, seamless means the gap between cabinets is small enough to be invisible at viewing distance, and that brightness and color match across the joint. On a dome, there is a third condition that does not exist on a flat wall: the surface must remain continuous in curvature. A joint can be perfectly tight and still be visible, because the two panels on either side of it meet at a slight angle. The eye reads that angle as a crease, especially in a dark scene where the screen is the only light source.
So there are three separate tolerances to control, and they are often confused with each other:
- Gap tolerance — the physical space between adjacent modules. Governed by cabinet machining and the frame interface.
- Step tolerance — the height difference between two adjacent module surfaces. Governed by structure flatness and mounting adjustment.
- Angular tolerance — the deviation between the actual panel normal and the theoretical sphere normal. Governed almost entirely by module geometry, and this is where rectangular cabinets fail.
Most suppliers can quote a gap figure. Very few can tell you how they control angular error across 5,300 square meters, because doing so requires modules that were designed for a sphere rather than cut to fit one.
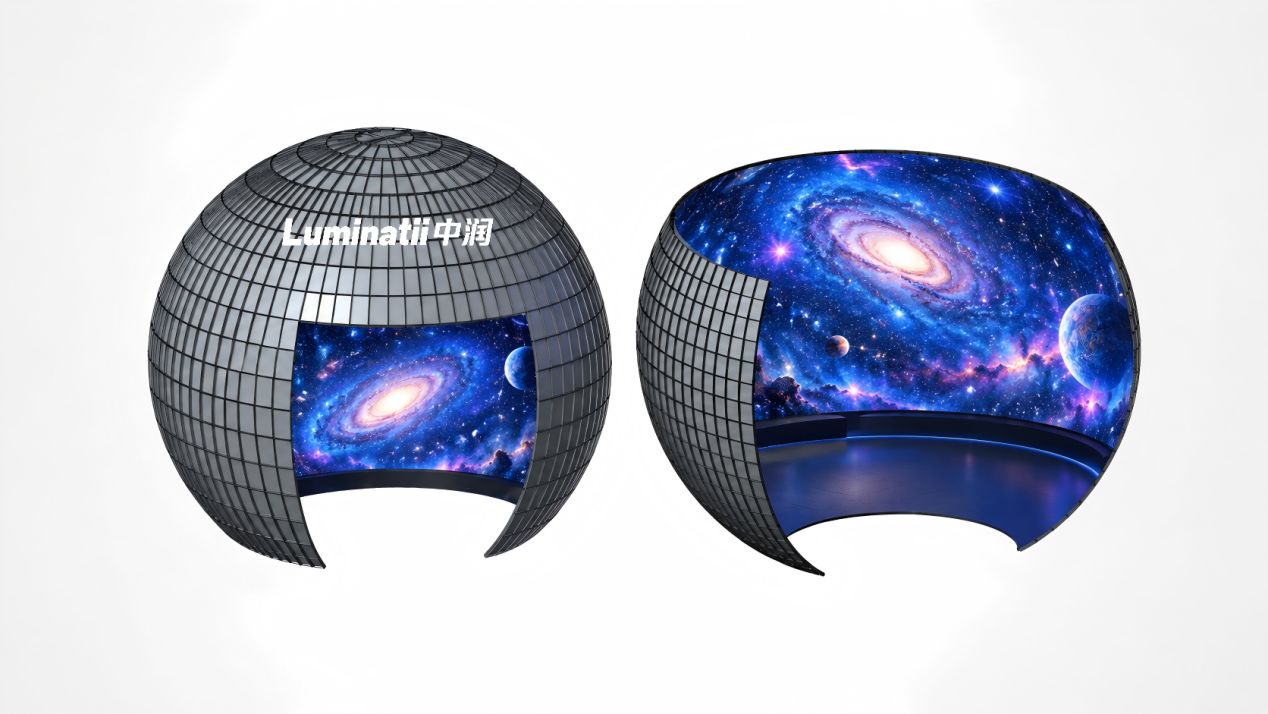
Why rectangular cabinets cannot tile a sphere
The problem is not aesthetic, it is mathematical. Take a flat panel of width w and press its center onto a sphere of radius R. The panel corners lift off the theoretical surface by an amount engineers call the sagitta:
h = R − √(R² − (w/2)²)
Work that through for a 60 m diameter dome, where R = 30 m. A 2 m wide module leaves its corners about 17 mm off the sphere. A 1 m module reduces that to roughly 4.2 mm. A 0.5 m module brings it to about 1 mm. Those numbers are why module size, not just pixel pitch, sets the visual quality of a large dome.
Now run the same calculation on a 5 m diameter dome, where R = 2.5 m. A 0.5 m module deviates by about 12.5 mm — three times worse than the same module on the 60 m dome. This is the counter-intuitive fact that catches out buyers who assume small domes are easy: the smaller the dome, the tighter the curvature, and the more punishing the module geometry becomes. A supplier who is excellent at 60 m is not automatically competent at 5 m, because the module set has to change.
The practical consequence is that a dome cannot be built from a single module size with a few filler strips at the joints. Filler strips are exactly what creates the visible "meridian" lines: they close the gap but they do not follow the surface, so they read as flat facets interrupting a curve. On a dome, a filler strip is a design failure that has been painted over.
The module set: trapezoid, triangle, and where each belongs
A sphere is tiled by varying the module's included angle rather than its side length. Our dome platform is built from triangular and trapezoidal LED modules with independently adjustable angles, which is what allows a single product family to cover diameters from 5 m to 60 m without cutting panels on site.
The logic of the set is straightforward once you see it:
- Trapezoids do the work on the body of the dome. Their two non-parallel sides converge toward the apex, so the modules naturally follow the meridians without leaving wedge-shaped gaps.
- Triangles solve the pole and the base ring. At the apex, the circumference approaches zero; a triangle can converge to a point where a trapezoid would have to be cut down to a sliver.
- Adjustable angle is the detail that separates a real dome module from a flat module with a trapezoidal outline. The angle between adjacent module faces changes with latitude, so the mounting interface has to allow the module to be set to the local surface normal rather than forced to a fixed angle.
| Approach | Joint quality on a sphere | Pole handling | Structural weight | Where it makes sense |
|---|---|---|---|---|
| Rectangular modules with filler strips | Visible facets; strips read as meridian lines in dark scenes | Poor — heavy cutting, dense joints | High, plus extra frame for fillers | Low-curvature partial domes only |
| Flexible modules on a curved frame | Good at small curvature, degrades as radius tightens | Difficult — flexing cannot resolve a convergence point | Moderate | Small domes and organic shapes |
| Trapezoidal + triangular modules, adjustable angle | Continuous curvature; joints stay below visibility threshold | Solved by dedicated triangle set | Low — 8.5 kg/m² on the 60 m Kongtong dome | Full range, 5 m to 60 m |
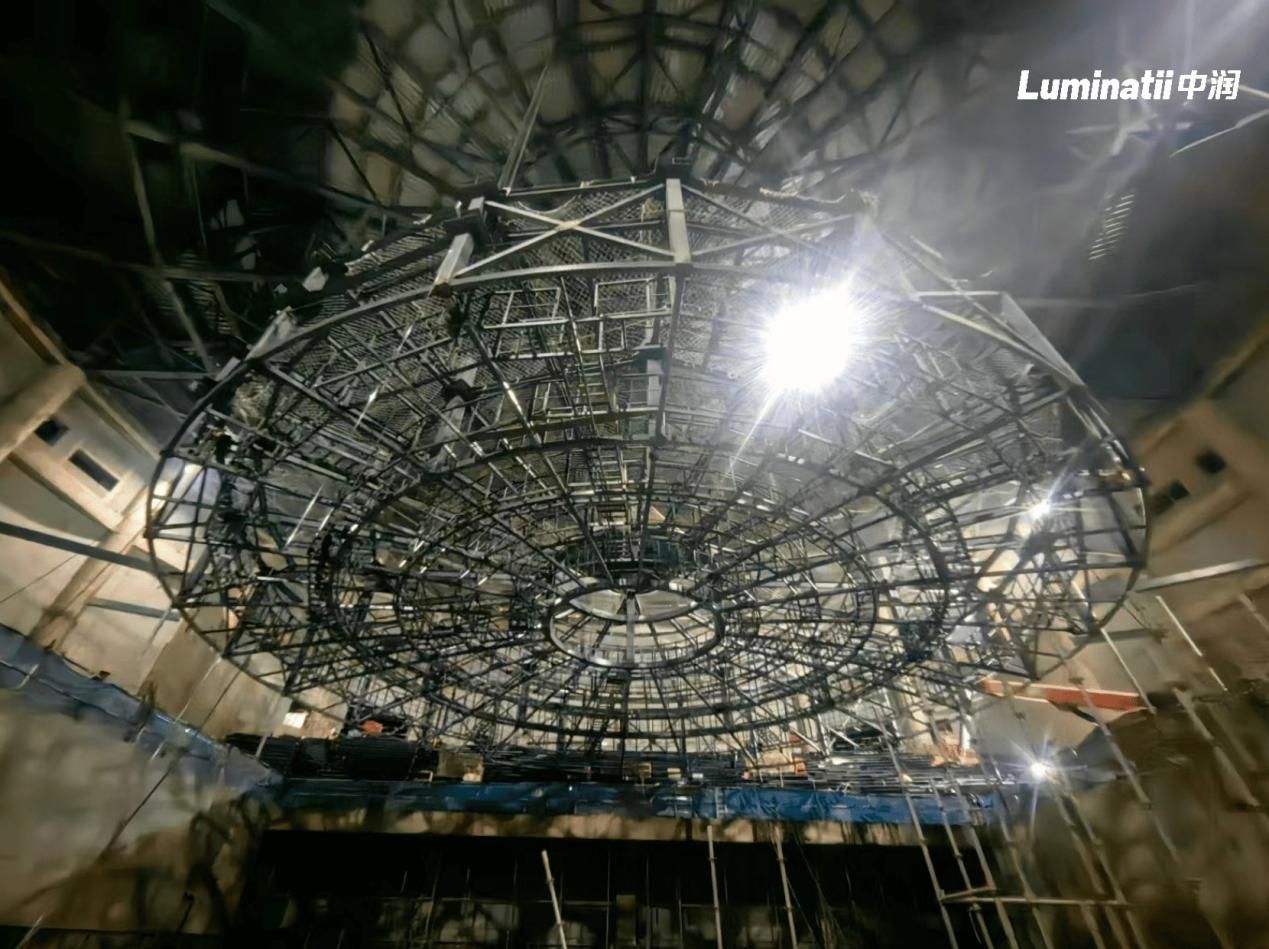
Pole geometry: the hardest square meters on the dome
Every dome has a place where the engineering concentrates, and it is always the apex. Two things happen there at once. The circumference goes to zero, so the number of modules per ring falls to a handful; and the pixel density per unit of solid angle rises, because the same module footprint now subtends a much larger angle to a viewer near the center.
Handled badly, the apex produces the two classic dome defects. The first is a visible rosette of joints at the top of the screen — obvious in any show that fades to black. The second is a brightness hotspot, because the ring of modules nearest the pole is viewed almost edge-on by the audience and its apparent luminance differs from the surrounding surface.
Handled properly, the apex becomes the strongest part of the image. A dedicated triangle set converging on a small cap plate keeps the joint count low, and the calibration pass treats the polar rings as their own zone rather than extrapolating from the equatorial modules. If you are evaluating two dome suppliers, ask each of them to show you a photograph of the apex in a black frame. It is the fastest test in the entire evaluation, and it cannot be faked by a rendering.
The base ring deserves equal attention for the opposite reason. It carries the highest dead load and it is where the screen meets the building, the floor, and usually the entrance. On 720° configurations — where a dome is combined with a digital floor, as in our Huangshi dome-in-dome project — the base ring has to resolve two different surfaces meeting at an angle, which is a joint problem rather than a module problem.
Tolerance, calibration, and why seams appear only in dark scenes
A dome that looks perfect in a bright test pattern can look flawed in a real show, and the reason is that a bright image masks small luminance differences while a dark one exaggerates them. Human contrast sensitivity peaks in low light, so the eye is most sensitive to seams exactly when the screen is dimmest.
Three things have to be true at once for a joint to disappear in a black frame:
- The gap has to be below the eye's resolution at the closest seat. This is a viewing-distance calculation, not a workshop one, and it is why a dome designed for a 200-seat venue needs tighter joints than the same dome viewed from a balcony.
- The luminance across the joint has to match. Our domes are calibrated to brightness uniformity deviation ≤ 5% and color deviation ≤ 2ΔE, with 16-bit grayscale processing so that the low end of the curve has enough resolution to correct without banding.
- The module edge has to be optically neutral. A bright or dark border on the module's own bezel becomes a drawn line once hundreds of modules are assembled. Edge treatment is a manufacturing decision made long before the project exists.
This is also why module replacement is not a plug-and-play operation. A replacement module arrives with its own LED binning, and dropping it into a calibrated wall without re-running the low-gray correction leaves a faint rectangle that shows up in exactly the scenes you care about. Our domes are serviced from both front and rear so a single technician can reach a module, but the calibration step afterwards is what actually restores the seam. Buyers should specify that the supplier's service procedure includes recalibration, not just physical swap — on a seamless LED dome the service manual and the calibration manual are the same document.
What to write into the specification
If you are tendering a seamless LED dome, the word "seamless" will appear in every proposal you receive. These are the items that turn it into a commitment:
- Module geometry — shapes offered, whether the included angle is adjustable, and the module count per ring at the pole.
- Module size versus diameter — the supplier should be able to show that the module size was chosen against the sagitta calculation for your diameter, not carried over from a larger project.
- Gap, step and angular tolerance — three separate figures, each with a stated measurement method.
- Apex detail drawing — the convergence solution, plus a black-frame photograph of a built dome's apex.
- Calibration scope — uniformity and color deviation targets, the measurement grid, and whether recalibration is included after module replacement.
- Panel weight per square meter — so your structural engineer can verify the steel independently. Our platform runs at 8.5 kg/m² against an industry norm of 15–25 kg/m², which on a 5,300 m² dome is the difference between a feasible retrofit and a new building.
- Mock-up — a small curved sample covering at least one full module joint, viewed in a dark room before production starts.
Two more numbers are worth putting in front of your engineer rather than your procurement officer. The 60 m Kongtong Island dome carries 8K resolution across 5,300 m² and was engineered and opened in about 180 days; both figures are only achievable because the module set, the structure and the calibration process were designed together. If a proposal promises a comparable schedule with a module family that was adapted from flat panels, the schedule is the first thing that will slip.
Frequently asked questions
Is a seamless LED dome more expensive than a panelled one?
There is a premium in the module tooling and in the tighter structural tolerance. It is usually recovered in three places: less on-site cutting and waste, a lighter screen that reduces steel cost, and a calibration pass that does not have to compensate for facets. On large diameters the structure saving alone often exceeds the module premium.
Can a flat LED module be bent to fit a dome?
Only up to a point. A flat module can be flexed to follow a gentle curve, but the deviation grows as the radius tightens, and no amount of flexing resolves the convergence at the apex. Flexible modules are a reasonable answer for small organic shapes and a poor one for a full dome.
How small does the gap have to be?
It has to be below the angular resolution of the eye at the closest seat, which is why the figure depends on your auditorium rather than on a catalogue. Ask for the gap in millimeters together with the closest viewing distance it was calculated for, and check the two together.
Does the module shape affect content production?
No. Content is mapped to the dome as an equirectangular image regardless of how the surface is tiled; the module layout is invisible to the media server. What module shape does affect is how faithfully that mapping survives — a faceted surface shows up as distortion in straight lines, which is most obvious in architectural and star-field content.
Why a seamless LED dome is decided before the first panel
Almost every dome defect that owners complain about in year three — the lines in dark scenes, the faint rectangle where a module was replaced, the hotspot at the apex — traces back to a decision made at the quotation stage: which module geometry, at what size, for this diameter. It is not a finishing problem and it cannot be calibrated out later.
Send us your dome diameter, seating layout and closest viewing distance. We will return a module layout with ring counts, the apex detail, gap and step tolerances referenced to your sightlines, and the panel weight your structural engineer needs — plus a black-frame photograph of a comparable built dome. See the LED dome screen platform for the base specification, or read how dome diameter drives every other decision before you fix the size.
Request a module layout for your diameter · How acoustic transparency changes the panel design · Read all 60 buyer questions